One more thing can be crossed off the ol’ nursery to-do list! Changing table? Check!
I remember before Clara was born a co-worker told me that changing tables were unnecessary since you usually end up changing the kid wherever is most convenient – like on the floor or the nearest piece of furniture – rather than going through the formality of walking all the way to the nursery. This was after we had already bought & refinished Clara’s changing table/dresser so the comment stuck with me, thinking I’d fallen into some first-time parent booby trap.
Surprisingly enough, we used Clara’s changing table religiously. Maybe because our house was small or because it was all one level. If we were at home she got changed on that table. And that routine stuck with us even when we moved to our second house, which was twice as big (but still a one level ranch).
Stairs might be a diaper changing game changer, though. So in this house we plan to keep some changing supplies downstairs for convenience. Anything to make your I-have-a-newborn routine easier, right?
We offhandedly mentioned when we started the nursery that we were considering using my dad’s old dresser that’s currently in our closet, which could double as a changing table. It’s not a permanent closet solution for us (we’ll eventually add a built-in closet system), and we kinda liked the story of our son having his grandfather’s 50-year-old dresser. But after completing the built-ins we realized that the eight drawers of storage they afforded us were awesome, and it was probably overkill to add four more on the other side of the room – especially when some sort of open, easy-access toy & game storage would be more useful for us over there.
So we scratched our heads for a little bit, and then we broke down our criteria:
- It needed a wide and flat surface to accommodate our changing pad (at least 15″ wide)
- It needed to have open storage mixed in with the possibility of adding a few bins or baskets to hide diapering stuff for a fleeting period of time
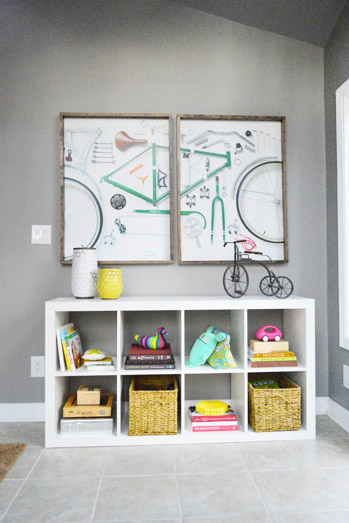
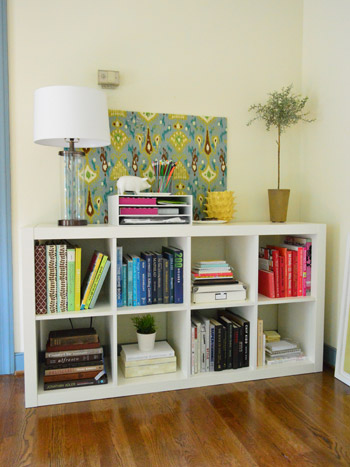
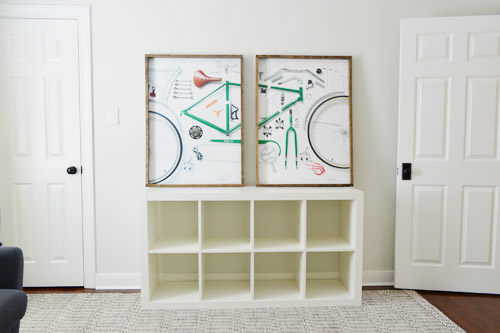
- It most likely needed to be wide (around 60″) to make sense on that long empty wall, while grounding the large bike prints that we planned to hang over it. Sort of like the storage cubbies in the photo below from our last sunroom…
It was literally looking at that photo above (we were checking to see how closely we had hung the prints together) that we had our A-HA! Why not the Expedit? It met all of our criteria and wasn’t serving a permanent function in its current home in our office (where we someday dream of adding an L-shaped file-storage area along with a floating desk/meeting table). And yes, this all happened right right as the news of the Expedit’s demise (or reincarnation?) hit the web – so it was sort of an all-signs-point-to-Expedit moment.
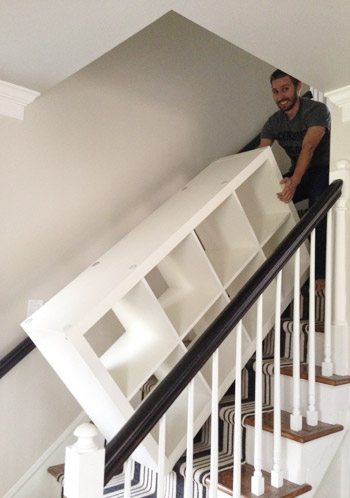
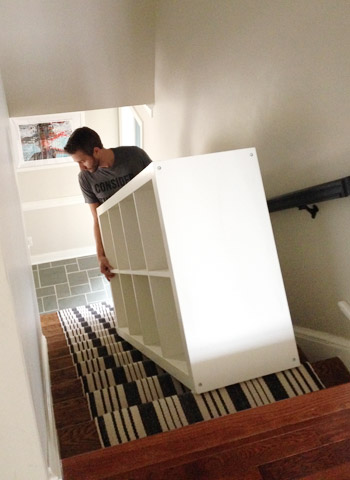
We unloaded everything (contributing more to the disaster that is our office) and I dragged it upstairs to see if the nursery should be its new home. And I say “drag” literally because I didn’t feel comfortable asking Miss Preggers to lift it. It was heavier than I remembered!
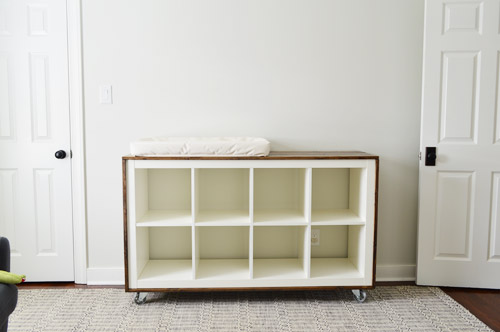
We put it in place on the wall opposite the built-ins and well, it was a bit underwhelming. Granted, it was very very empty and even the changing pad would eventually get a colorful cover. But it wasn’t a compelling case for the Expedit.
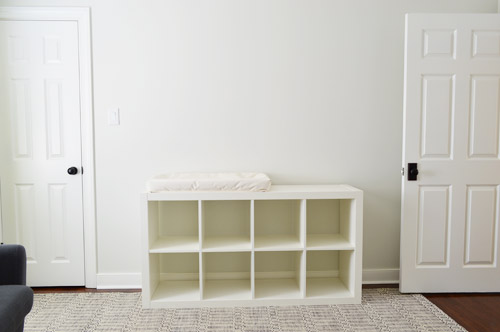
We leaned the bike art up to see if that helped, which it did, but we still felt like something needed to be done to make the Expedit a little more upgraded and not as blendy with the wall, rug, and doors.
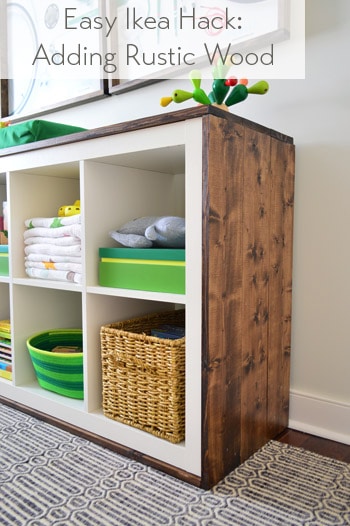
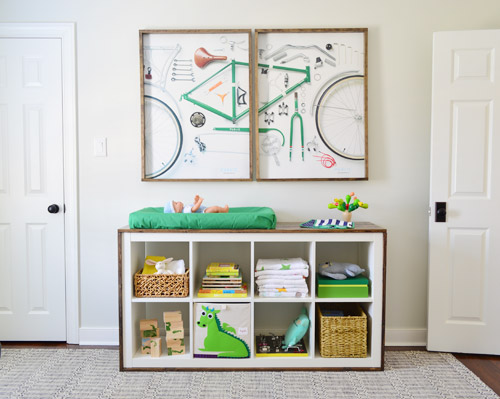
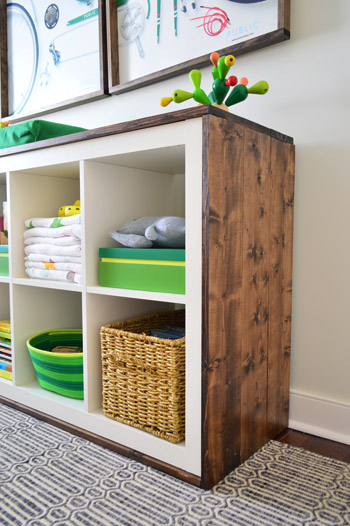
So we had an idea. A hack, if you will. To add some contrast, and sort of nod to Clara’s white-and-wood changing table, we decided to wrap the outside of the Expedit with stained wood. This would also tie it into my homemade bike art frames, as well as the wood-topped built-ins across the room. You know, kinda like this…
That’s not Photoshop above (I wish I was that good!) – it’s the real after. I thought it would help for you to see that before I dove into the How-To part of the post. So let’s rewind to that, which started with me dragging the Expedit back out to the garage.
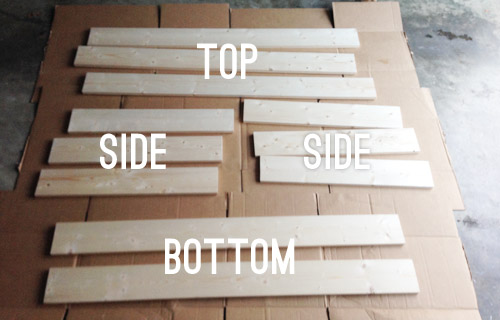
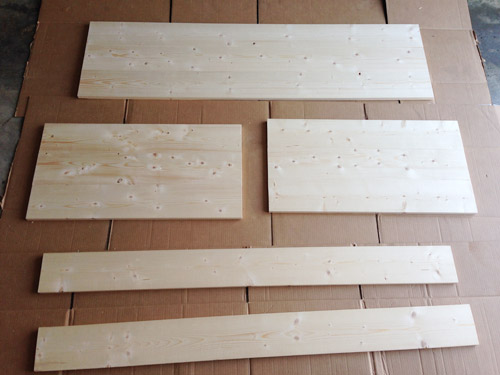
Our measurements revealed that three 1 x 6″ boards would be wide enough to cover the Expedit, leaving about a 1/2″ of an overhang on each side. This was nice because it would give the changing pad a bit more surface to sit on (it was the exact width of the original Expedit). We bought basic whitewood because it’s the same stuff we used to make our living room console table, which has held up great for the past few years, and the price was right ($5 for a 6 foot piece). We also wanted a slightly rustic wood look, like we achieved with the console table.
Here are all of the pieces once they were cut to size at home on our miter saw.
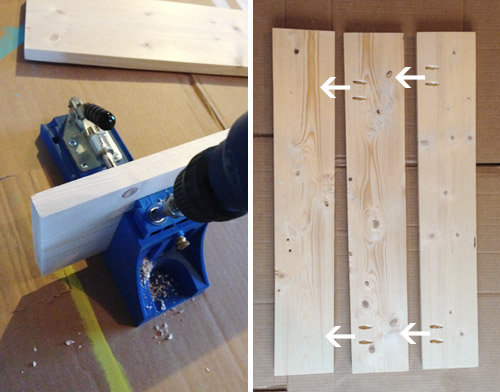
To attach the boards into big panels, I used my Kreg Jig to create pocket holes and then I could join each set of 3 side-by-side. It’s the same technique I used for the console top, so you can read more about it here. Note: I often make two holes if they’re going to be hidden when using the Kreg, just so if my first attempt at joining doesn’t line up perfectly, I can try again without having to break out the drill again.
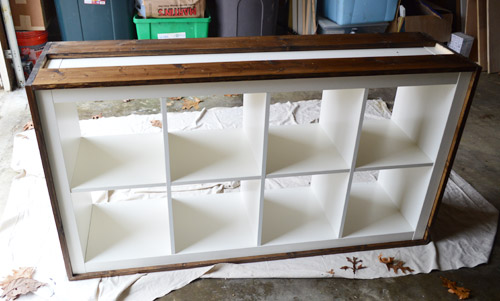
Here are the finished boards all joined together. It’s also after I gave them a quick sanding to soften the edges and any ridges between the boards. I only bought two pieces for the bottom since no one will ever see the missing middle piece – so that explains why those are hanging out by themselves at the bottom of this shot.
Before staining, we decided to take wood conditioner for a spin. Its job is to “prepare” the wood for staining, reduce unevenness/blotchiness, and enhance the color. This small can was $6, so it’s not much of a “risk” – and richer and more even results sounded good to us. It goes on much like stain – you brush or wipe it on, let it penetrate for a few minutes (I gave it 15), and then wipe off the excess. You just have to be sure to stain within 2 hours of the application.
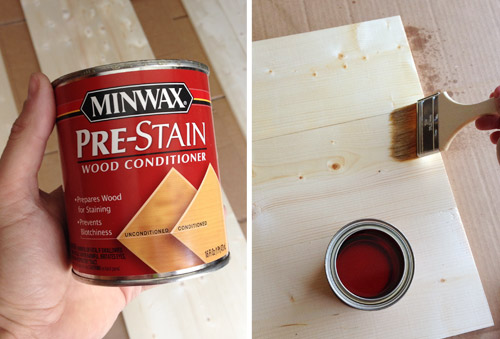
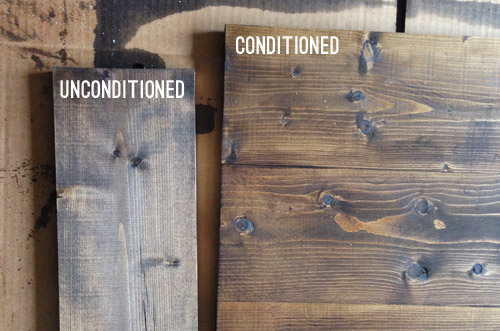
We used the same Minwax Dark Walnut stain that we’ve used elsewhere in the room for consistency (like on the counters of the built-ins and the bike art frames) and only needed one coat. For demonstration purposes, I stained a piece of unconditioned scrap wood (it’s the same exact type of wood, just a leftover piece) to see if there was a difference in using the conditioner. Both Sherry and I were pretty surprised by the comparison. I definitely felt the stain soak in more on the conditioned wood during application, and the color is noticeably richer/warmer on the conditioned wood.
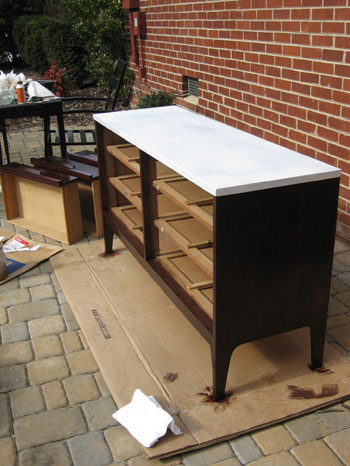
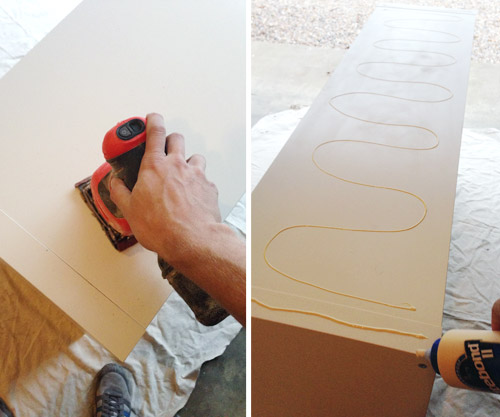
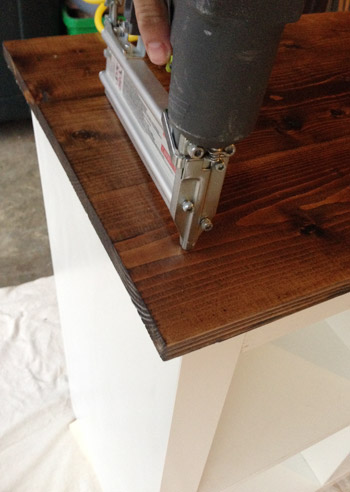
When the stain and my two coats of Safecoat Acrylaq were dry (that’s our favorite poly alternative because it’s non-toxic and locks in any potential fumes or offgasing) I could finally begin attaching these wooden panels to the Expedit. I decided to go with a simple wood-glue-and-nails system, so that I wouldn’t have screw heads to hide after the fact. I prepped the Expedit surface by roughing it up a bit with sandpaper and then applying a bunch of wood glue.
Then I used my nail gun to secure them in place with some 1.75″ brad nails (thank goodness for the thick frame on the Expedit).
Then I did the same with the sides for sort of a waterfall-edge effect.
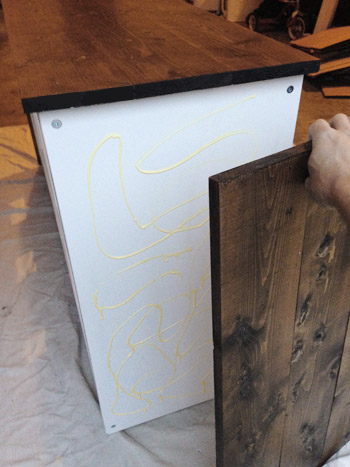
I let those dry overnight before attempting to flip the piece over and attach the bottom pieces. You can see how I just put them on either end in this shot, since that middle slice will never be seen.
After letting everything dry for a couple of days, I dragged it back upstairs and started on the next step – adding legs and casters. Sherry and I thought two of these chunky $5 casters from Home Depot would be a nice touch, while some stationery legs (made from 2 x 2″ pine and Kregged to the back and middle) would keep it from rolling around mid-diaper-change.
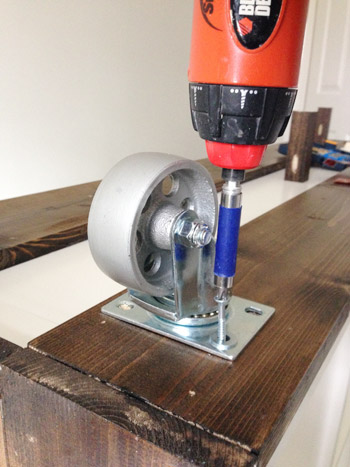
If you’re scratching your head about where the casters were on the after picture, well, they weren’t there. Because we decided they weren’t right for this application. The height they added made the changing pad uncomfortably high (we thought we’d like that added height, but it was a good deal higher than the changing pad height that we were used to in Clara’s room) plus it would’ve meant the art above it would have to hang even higher than the doorway tops, which we thought would look off.
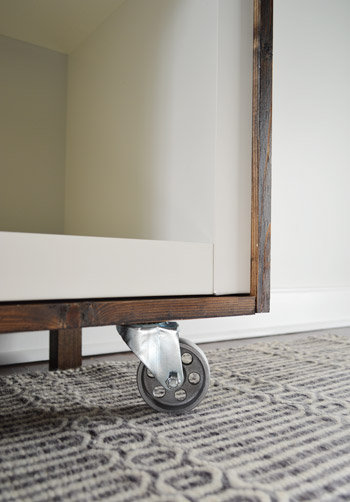
But we really liked the look of it, so we wanted to share the idea in case it worked better for someone else’s application…
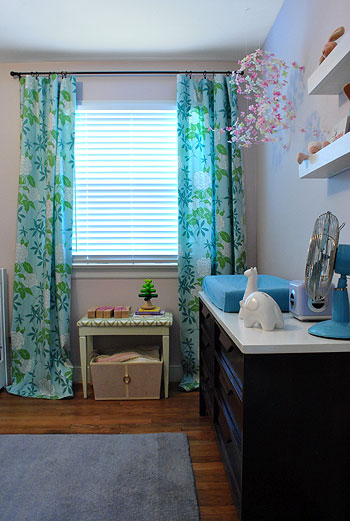
It was just a matter of unscrewing a few things to get back to the sitting-straight-on-the-floor look (which also has the benefit of not creating a spot for dust and toys to collect). Then Sherry helped me hang the art and fill the shelves.
Update: There have been a few questions about the height of the changing station. The Expedit itself is 31″ and the wood frame added a few more inches, and the pad itself sits on top of the dresser, so the baby is around 34″ from the ground on the Expedit with the pad on it. Clara’s dresser with the pad on it was around 33″ from the ground – so that range seems to be what we prefer.
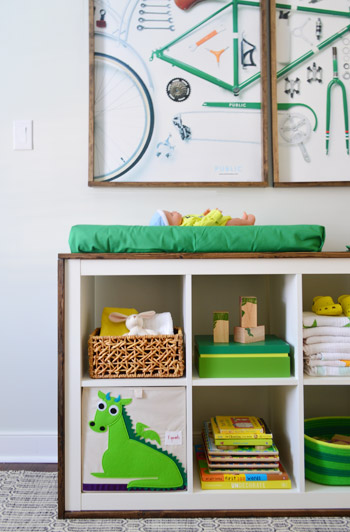
The stuff on the shelves is mostly placeholder items (another bin or basket for diapering supplies will definitely end up in the mix). In fact they’ve already been tweaked a little in the rest of the photos in this post. But you hopefully get the idea of how this’ll function for us.
It’s nice to have some concealed storage, plus some open toys and books that he can easily access. The 3 Sprouts dragon box was a gift from Sherry’s friend Cat during Clara’s dragon-loving days that Clara brought in and said was for her brother because he likes green (yes, Sherry melted into a puddle). Who knew those bins were perfectly sized for an Expedit? Apparently Clara did.
We might need to get a few more large baskets to house diapers and wipes more easily, but other than that, this changing area has shaped up quite nicely. Well, except for the fact that the changing pad cover is just leftover fabric that Sherry tucked around it – so we have to buy/make a real cover soon.
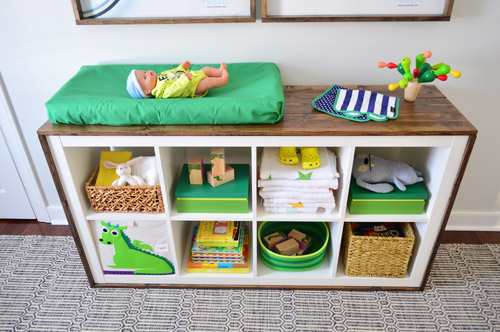
The funniest part of this entire endeavor was when Clara brought in a baby onesie from a to-be-washed pile in the guest bedroom and said Barnacle wanted to wear it while we took his picture. Apparently we have an accidental tradition of dressing up not-real-babies in the nursery before the real baby arrives, since this happened in Clara’s crib after we set it up.

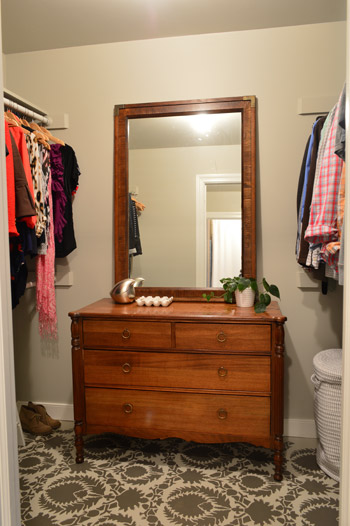
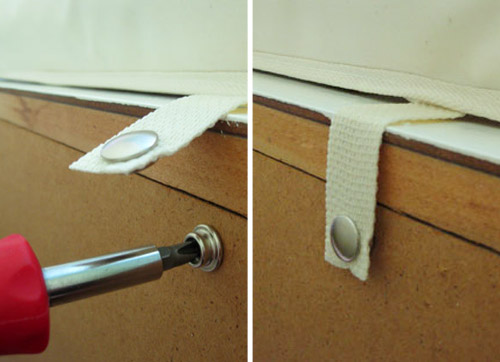
Oh and for anyone wondering how the changing pad is secured in place, it’s the same one we used for Clara, and it has two over-sized snaps on the back that attach to snaps that get screwed into the furniture or wall from the back. These are pics from making Clara’s dresser (which you read more about here) but we were easily able to remove them and screw them into the back edge of the Expedit.
We’ve also used heavy duty 3M command velcro to adhere the bike art firmly to the wall beyond the screws-into-studs/anchors hanging method that we used. So the little guy shouldn’t able to knock it off the wall or even pull it off (not that he’ll ever be unsupervised up there anyway). We did joke that it could get peed on, but the slick poster board material will hopefully work in our favor. We also have a hilarious tiny tent-like item that was a gift for keeping the spray at bay, if you will.
We’re really happy with how this little upgrade turned out, and we’re hoping it has some lasting value as toy and book storage when Barnacle gets older. I’m already picturing it stuffed with bins of legos. And the cost of our update was around $45 – the wood was $39 and the wood conditioner was $6 – since we already owned the stain and returned the casters (you can add $15 to cover those if you don’t have ’em).
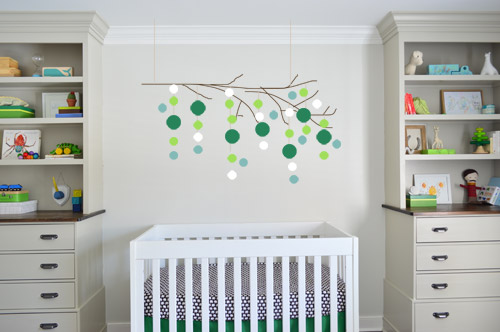
The nursery is feeling much more complete now that we’ve dealt with that formerly empty wall. And Sherry’s putting the finishing touches on her mobile project for over the crib (this is just a photoshopped version of what she’s going for), so she’ll be back with those details in the next few days. It’s amazing how much more homey a room feels without two big blank walls staring back at you.
Aaaaaand I just realized the fun part of diaper changing is pretty much over. It only gets uglier from here. Speaking of which, we haven’t forgotten that we need to add a place for dirty diapers (we’ve had luck with this method for Clara, so we might go that route again). How’s that for a note to leave off on?
Do you guys use changing tables, or are you bed/floor/random-other-spot folks? Have you done anything fun to an Expedit lately? It’s amazing how many hacks there are. Can you believe Ikea’s retiring them (or at least tweaking and renaming them)? Will the new name stick, or will we all still call them Expedits?
Update – Wanna know where we got something in our house or what paint colors we used? Just click on this button:

More posts from Young House Love


Original article and pictures take https://www.younghouselove.com/changing-tables-and-our-minds/ site
Комментариев нет:
Отправить комментарий